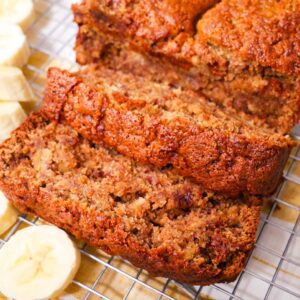
Tiger Nut Flour Banana Bread
Packed with the rich, nutty flavor of tiger nuts and the sweetness of ripe bananas, this tiger nut flour banana bread is a perfect treat for any time of day. Disclaimer: This post may contain affiliate links, which means we will receive a commission if you purchase through those links at no extra cost to you.
Equipment
- Parchment paper
- Aluminum foil
- 1 Standing mixer or large bowl and mixer
- 3 Mixing bowls - large, medium and small
- 1 Small bowl
- 1 9x5 Rectangular Loaf Pan
- Measuring cups and spoons
Ingredients
- 2 TBS Olive Oil
- 1 Cup Granulated sugar
- 1/4 Cup Greek yogurt
- 2 Eggs or Egg Replacer
- 1 TBS Vanilla extract
- 3-4 Medium ripe bananas mashed
- 2 cups or 240g Tigernut Flour AP flour
- 1 ½ or 10g tsp Baking Soda
- ¼ tsp Salt
- 1 tsp Cinnamon
- Your preferred topping. Adding a cup of blueberries was another favorite combination we enjoyed with this bread.
Instructions
- Preheat oven to 350°F (177°C). Grease a 9x5 inch loaf pan. Cut out a piece of parchment paper to line the bottom of the pan only and grease that as well. Set aside.
- Whisk olive oil and sugars on low speed in a large bowl for 2-3 minutes.
- In a separate bowl, prepare the egg replacer according to the package instructions and add it to the bowl. Add Greek yogurt and vanilla extract.
- Mash bananas in a separate bowl and mix into the wet ingredients.
- Combine flour, baking soda, cinnamon, and salt in another bowl.
- Add dry ingredients to the wet mixture and whisk until fully combined.
- Fold in any desired toppings with a spatula.
- Pour mixture into a greased 9x5 inch loaf pan. If you used an egg replacer, we recommend letting the batter rest in the pan for 30 minutes.
- Place an aluminum foil "tent" over the top of the loaf pan. You want the middle of the foil to be higher than either side. This will keep the top of the bread from browning too much, while letting the heat circulate over the bread.
- Bake for 55 minutes. In the last 5-10 minutes, remove the foil and continue to bake.
- Check doneness with a toothpick or fork; the center should be set. If it's not, keep baking in 3-5 minute increments.
- Cool in the pan for a few minutes. When it's safe enough to handle, run a flat spatula around the sides of the loaf pan. Then, carefully flip the loaf pan onto a cooking rack or a plate. Peel away the parchment paper and turn it over, right side up.
- Allow it to cool before serving. Enjoy!